Jim's Pole Barn Project - hopefully

/ Jim's Pole Barn Project - hopefully #281  
Re: Jim\'s Pole Barn Project - hopefully

<font color="blue"> Hope when the Inspector comes down to wire in the power he'll "Approve" of my alternate. </font>

TSK,TSK,TSK..........
That's why they make a ½" deep 4" round box. It's large enough for one 14/2 w/ground.
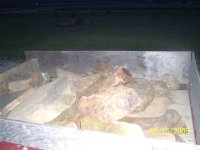
Looks good though Jim. Monica care to have some large rocks back there?? /forums/images/graemlins/grin.gif /forums/images/graemlins/grin.gif
 
/ Jim's Pole Barn Project - hopefully
  • Thread Starter
#282  
Re: Jim\'s Pole Barn Project - hopefully

</font><font color="blue" class="small">( That's why they make a ½" deep 4" round box. )</font>

Didn't think about one of those. /forums/images/graemlins/blush.gif

</font><font color="blue" class="small">( It's large enough for one 14/2 w/ground. )</font>

How would I pick up the other light? Go all the way over & come back?

</font><font color="blue" class="small">( Monica care to have some large rocks back there?? )</font>

Funny you should mention that the other day. She was just asking what happened w/ getting your rocks. Let me know and I'll stop and help you take them out and I'll load them in my truck. She keeps saying she needs a bunch more rocks. She joined a pond forum and they have given her some ideas, but they'll require a bunch more rocks.....ohhhhh my back hurts..... /forums/images/graemlins/grin.gif
 
/ Jim's Pole Barn Project - hopefully #283  
Re: Jim\'s Pole Barn Project - hopefully

Don't your fixture blocks have an integral j-box? If not, man you missed the boat because they are slick! The fixture blocks with out the integral box are usually the perfect depth for a weather tight box (round). I think they're 1 & 1/2" deep. That gets mounted oustide, no hole in the sheeting except a small hole to run your wire into the back of the box. I can't really picture what you did, but if you have no box to contain your spicles you'll want to re-work that for the inspector and most importantly for your safety. example of an intregal fixture block
 
/ Jim's Pole Barn Project - hopefully #284  
Re: Jim\'s Pole Barn Project - hopefully

Jim,
PSSSTT.....Buddy, we both have tractors, they both have loaders. Why is there any need for an aching back? /forums/images/graemlins/grin.gif
 
/ Jim's Pole Barn Project - hopefully
  • Thread Starter
#285  
Re: Jim\'s Pole Barn Project - hopefully

Those are slick!!!!. Guess I missed the boat again. Wish I would've had those, that would've have been simple. I might have to be doing some rework. I asked the people at both 84 Lumber & Lowes how to put a box in for the siding blocks and nobody could really tell me.

What I did, was drilled a 4" hole used an old work junction box with the little ears. I knew something didn't look quite right, but I didn't know what. Any thoughts of how I can fix my booboo? I'm thinking of using the hole saw to make me some new inserts and some how attaching those from the inside and then mount the weather proof boxes. Does that sound like it would work?
 
/ Jim's Pole Barn Project - hopefully
  • Thread Starter
#286  
Re: Jim\'s Pole Barn Project - hopefully

</font><font color="blue" class="small">( Why is there any need for an aching back? )</font>

Positioning around the pond. While I was finishing up installing the skimmer today she started doing her "ledge." She had me moving some of the bigger ones. I know a couple of them are over 100 lbs. Not a lot, but yet quite a bit when you are standing on the edge of a wet/slick pond liner and have to pick it up from the ground and move it about 3 feet.

Of course, I also relearned today to not trust the judgement of her eyes. I asked her about the height of the skimmer in relation to the water level we usually keep the pond at. Guess what? When all was said and done, the skimmer is a little too low in relation to the water /forums/images/graemlins/shocked.gif /forums/images/graemlins/frown.gif /forums/images/graemlins/mad.gif. For now we will just lower the water level a little, but I'll have to figure out a way to eventually move the skimmer up. I think I'll also have to move it in toward the pond a little to compensate for the height adjustment.
 
/ Jim's Pole Barn Project - hopefully #287  
Re: Jim\'s Pole Barn Project - hopefully

Jim - I thought I explained how you should do it but I'll repost:

<font color="purple"> "The fixture blocks with out the integral box are usually the perfect depth for a weather tight box (round). I think they're 1 & 1/2" deep. That gets mounted oustide, no hole in the sheeting except a small hole to run your wire into the back of the box." </font>

I'm assuming your fixture block is a two peice type. So, just pull off the outter portion and mount your j-box to the sheeting. The romex should be installed and clamped to the j-box. Then cut the outter part of the fixture block using the pre-stamped guide lines for the round box. Snap the outter part back on....presto.....done.
 
/ Jim's Pole Barn Project - hopefully
  • Thread Starter
#288  
Re: Jim\'s Pole Barn Project - hopefully

Understood that, just gotta figure out how to undo what I've already done. /forums/images/graemlins/blush.gif /forums/images/graemlins/frown.gif I've drilled 4" holes already and install old work round boxes /forums/images/graemlins/frown.gif. I need to figure out how to "patch" this and then install the new weatherproof boxes.
 
/ Jim's Pole Barn Project - hopefully #289  
Re: Jim\'s Pole Barn Project - hopefully

Did you use a hole saw? Still got the plug? How about glueing that sucker back in?
 
/ Jim's Pole Barn Project - hopefully #290  
Re: Jim\'s Pole Barn Project - hopefully

Jim,
If you get the boxes/siding blocks, I'll come down and help put them in. Shouldn't matter if the OSB has a 4" hole in it or not. All 3 in the front can be changed to match.
 
/ Jim's Pole Barn Project - hopefully
  • Thread Starter
#291  
Re: Jim\'s Pole Barn Project - hopefully

OK, have some more updates. Sorry for the delay, been kinda busy here lately. Also sorry about the quality of the next few shots. It was starting to get dusk and the camera had a hard time compensating and I didn't take the time to adjust the camera.

In this first shot, Jerry (Inspector507) and I had been talking about rocks for the pond. Here is a load of rocks that Monica and I went and collected last week. They are still siting on my little trailer. She said she wants to redo the waterfall on the pond. Told her it had to wait until spring. We have enough projects that need wrappin' before winter and at least the way it is, it is working.
 

Attachments

  • 718921-100_0632.JPG
    718921-100_0632.JPG
    43.3 KB · Views: 309
/ Jim's Pole Barn Project - hopefully
  • Thread Starter
#292  
Re: Jim\'s Pole Barn Project - hopefully

Next shot is the front of the garage. My little NH and I have gotten to know each other a lot better the last couple of weeks. I've scrapped the top soil off of what will be the driveway extension going to the garage. Wasn't worried about getting every little crumb of grass out of the driveway but wanted most of it. I even left one little section as that is where the phone line is and they weren't too happy last time when I cut it. I knew where it was and I warned them that I was going to do it. /forums/images/graemlins/frown.gif
 

Attachments

  • 718924-100_0633.JPG
    718924-100_0633.JPG
    37.9 KB · Views: 304
/ Jim's Pole Barn Project - hopefully
  • Thread Starter
#293  
Re: Jim\'s Pole Barn Project - hopefully

Here is the pile of dirt that came out of the garage and driveway. BTW, the brown shed in the back ground is 12' wide for perspective and that is a 500 gal. propane tank.
 

Attachments

  • 718927-100_0634.JPG
    718927-100_0634.JPG
    50 KB · Views: 267
/ Jim's Pole Barn Project - hopefully
  • Thread Starter
#294  
Re: Jim\'s Pole Barn Project - hopefully

Closer shot of the dirt. I thought I did a pretty good job of gettin' stacked up there with my little NH. One of the problems I ran into with the little guy was his reach. The loader would go higher, but the higher you went the wider the base got and it made it hard to get up to the top of the pile. I would run up it a little bit, but not so much as to make the tractor tippy or anything.
 

Attachments

  • 718930-100_0635.JPG
    718930-100_0635.JPG
    35.2 KB · Views: 230
/ Jim's Pole Barn Project - hopefully
  • Thread Starter
#295  
Re: Jim\'s Pole Barn Project - hopefully

Backside shot of the dirt.
 

Attachments

  • 718931-100_0636.JPG
    718931-100_0636.JPG
    33.9 KB · Views: 197
/ Jim's Pole Barn Project - hopefully
  • Thread Starter
#296  
Re: Jim\'s Pole Barn Project - hopefully

Don't know if you can see it or not, but if you look close you can see the path I wore in the grass bringing the dirt over here.
 

Attachments

  • 718933-100_0637.JPG
    718933-100_0637.JPG
    51.4 KB · Views: 208
/ Jim's Pole Barn Project - hopefully
  • Thread Starter
#297  
Re: Jim\'s Pole Barn Project - hopefully

This is inside after the topsoil was taken out. I've started laying out for the drains. I'm putting in 3 floor drains, one under each car and one under the tractor area. I'm trying to avoid the "oily" areas of each and truly use these for water/snow drainage. I'm also putting in 3 drains along the walls. One along each wall. 2 will be capped off for future use, the other is where I plan on putting the sink. Did I mention that someone gave me a 6 gal. electric water heater. I've got it sitting in a trash can waiting for the floor to be poured so that I can install it.
 

Attachments

  • 718944-100_0638.JPG
    718944-100_0638.JPG
    42.8 KB · Views: 251
/ Jim's Pole Barn Project - hopefully
  • Thread Starter
#298  
Re: Jim\'s Pole Barn Project - hopefully

Another shot of the pipe including the feeder pipe going to the one wall. I ran 2" pipe for the floor drains and joined 1 1/2" to it from the walls.
 

Attachments

  • 718946-100_0639.JPG
    718946-100_0639.JPG
    37.8 KB · Views: 226
/ Jim's Pole Barn Project - hopefully
  • Thread Starter
#299  
Re: Jim\'s Pole Barn Project - hopefully

Another shot looking back at the "main" pipe coming from the tractor area. Toward the very back you can see the pipe heading to that wall, but it wasn't glued in place so isn't entirely in the correct location. Just behind the wheel barrow on the right side of the picture you can see the pipe going over to pick up where the sink will be. Since I'm just draining gray water, I'll be burying a 55 gallon drum to receive the water for disbursement.
 

Attachments

  • 718950-100_0640.JPG
    718950-100_0640.JPG
    29.5 KB · Views: 227
/ Jim's Pole Barn Project - hopefully
  • Thread Starter
#300  
Re: Jim\'s Pole Barn Project - hopefully

This is what it looks like 129 tons later. I still have a couple of low spots that need filled in addition to the garage doors, but I had already talked the truck driver into an extra load that day and at 9:30 PM Saturday night, I wasn't about to ask for another.
 

Attachments

  • 718953-100_0649.JPG
    718953-100_0649.JPG
    58.2 KB · Views: 293

Marketplace Items

(1) KENMORE WASHING MACHINE (A60432)
(1) KENMORE...
30 INCH TOOTHLESS BUCKET FOR MINI EXCAVATOR (A58214)
30 INCH TOOTHLESS...
2013 Chevrolet Silverado 1500 Pickup Truck (A59230)
2013 Chevrolet...
2000 FORD F-550 XL SUPER DUTY DUALLY SERVICE TRUCK (A60430)
2000 FORD F-550 XL...
2020 DY TP90 TRAILER MOUNTER CONCRETE PUMP (A59905)
2020 DY TP90...
2019 CATERPILLAR 326FL EXCAVATOR (A52709)
2019 CATERPILLAR...
 
Top