New Mods to Loretta's 284 Jinma

   / New Mods to Loretta's 284 Jinma
  • Thread Starter
#91  
Well, I finished the Fire Extiguisher mount today. It turned out pretty nice.
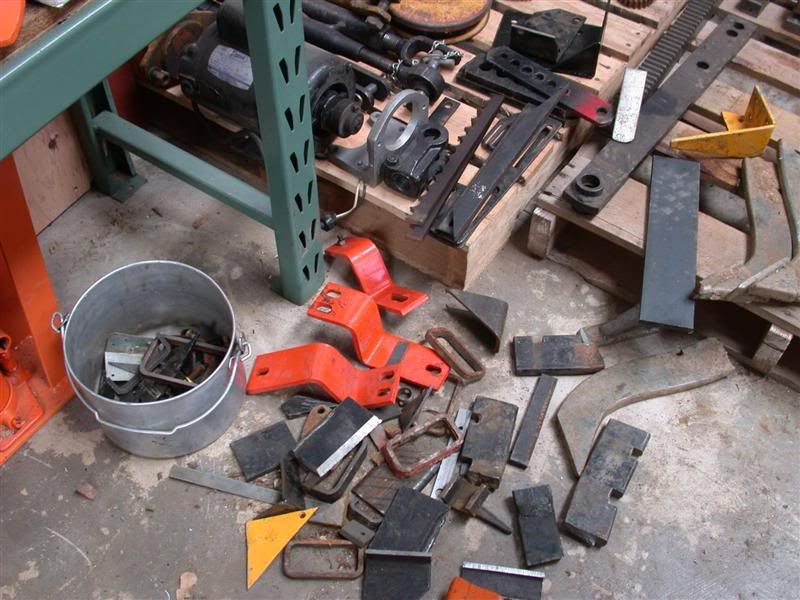
You know I always save my junk and scrap hoping to turn it into something useful later on. I found the seat mount from when I changed my Kama seat plus some scrap steel from when I added my backhoe sub frame. I also found one of those lever clasps that I had bought for something about 10 years ago. You can't believe the little pieces of scrap I save for projects just like this one.


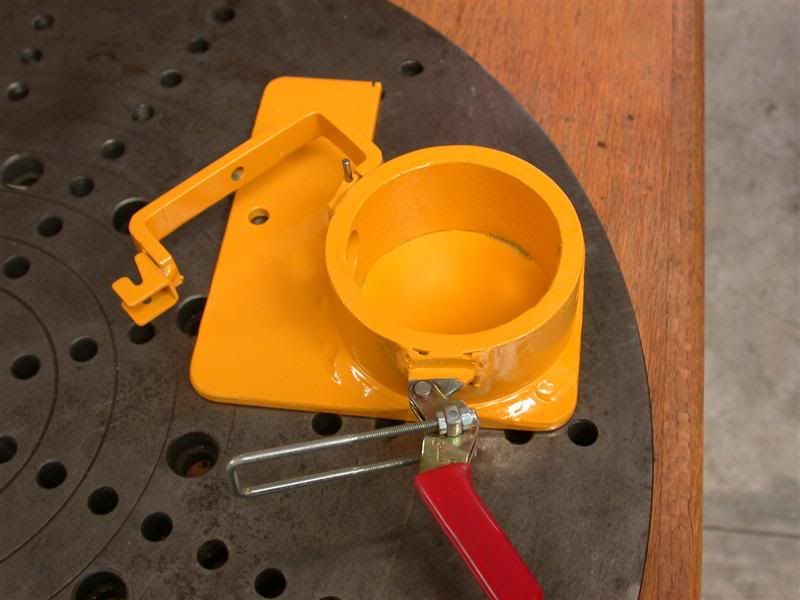
My idea was to use the holes in the round tube.
The inside of the tube fit the fire extinguisher perfectly. I just needed something that would pinch the OD of the extinguisher so it wouldn't fall out. I wanted a quick release lever of course. I used a piece of aluminum and a socket head cap screw and adjusting nut to make this mounting bracket. I made a little hinge using a dowel pin that presses into the bottom hole of the fixed hinge. So the hinge itself swings freely. I will line the inside of the tube with felt later. The mounting bracket holds the extinguisher firmly.
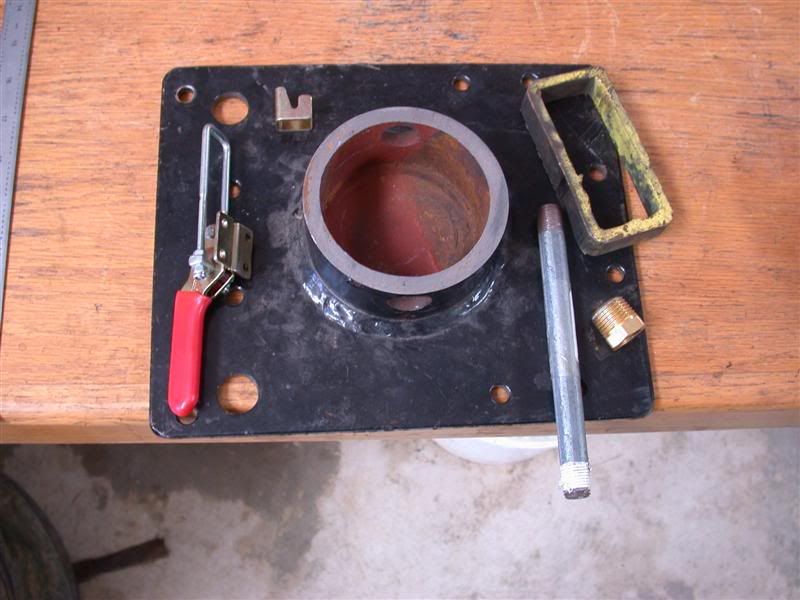
This is how it turned out.
Rob-

 
   / New Mods to Loretta's 284 Jinma
  • Thread Starter
#92  
Below shows the mounting bracket installed on the tractor.
A close up of the latching mechanism reveals how the extinguisher is held in it. A quick flip of the lever and the extinguisher is free to use. The other photos show where it's located on the tractor.
I can take that project off the list now too. :)
Rob-

 
   / New Mods to Loretta's 284 Jinma #93  
Another great idea. Maybe you should patent your fire extinguisher, and start producing them. Of course you can do this in your spare time.:D

Shane
 
   / New Mods to Loretta's 284 Jinma #94  
Looking at your shot of the seat area, I think HoneyBee gets the prize for the most hydraulics on a small tractor!
 
   / New Mods to Loretta's 284 Jinma
  • Thread Starter
#95  
Thanks guys,
The quick release mount really came out nice!
I got the last of the list done (except the cup holder) Friday night after the UPS came at 4:30pm.
Loretta has been itching to get her tractor back so I stayed late to plumb it all up. After refilling the hydraulic reservoir, I started the tractor. It ran for a minute and then started to bog down? I quickly looked at the hydraulic psi guage and saw it at 2,100 psi so I shut the tractor down. I figured I might have screwed up somewhere ... perhaps plumbing an "in" line to an "out or something? After all, I've been waiting 4 weeks for those fittings now, so it's possible I got the hoses mixed up. I left it and went inside to go to bed.

But during the night, running the connections through my mind, it came to me.
The last SV section on the valve has detents. Could it be that I clicked it up or down while attaching the hoses? I was hoping that was it. So early the next morning I got to the barn and saw that particular lever was not in the same place as the other spring loaded lever. It was down more. I checked to see if it would go down further but NO. I moved it up one click and then up another. Turns out that was the problem. I had it clicked down so one of the rear remote port was being fed and the fluid was bypassing. WHAT A RELIEF.

I started the tractor and it ran fine.
That was the problem after all. I tried the hydraulics and they all worked GREAT! No leaks at all. Below are some photos of the finished installation. I used the hose protector that came with the original valve and wrapped each set of hoses in them.
Rob-

 
   / New Mods to Loretta's 284 Jinma
  • Thread Starter
#96  
Below are some photos that show the articulation of the side links.
You can see how easy it is to tilt the implement now. She has the rake on but this will work for the box blade and whatever else too, of course. Hooking up implements is super easy because she has two hydraulic side links. Notice the extreme amount of side tilt she gets because she has two adjustable side links instead of just one.
No more having to get off the tractor to adjust the side links for angled or level work. It's all done with the flick of a lever from the operator's seat.


These below are of the top link.
Shown level, fully extended and then retracted. Again, for ease of adjustment to increase or decrease the angle of the tines or cutting blade on the box blade. Hooking up the top link is easy now by moving in or out to match where the top link connection hole is on the implement too.
Rob-

 
   / New Mods to Loretta's 284 Jinma #97  
But during the night, running the connections through my mind, it came to me.

I do that too. Came out really nice, Rob. I am going to have to try some
of those reusable hose ends....
 
   / New Mods to Loretta's 284 Jinma
  • Thread Starter
#98  
Loretta was pretty excited and so was I.
She immediately tried it out where she will plant her garden. She purposely tried the side tilt just to see how easy it was to angle and then level it out again.
Looks like she likes the improvements a lot.


Loretta wanted to rake the area where she will plant her garden.
She wanted to remove all the rocks and logs before she hooks up her rototiller. Next week she will till it all up and mix in the mulch.
Rob-

 
   / New Mods to Loretta's 284 Jinma
  • Thread Starter
#99  
I do that too. Came out really nice, Rob. I am going to have to try some
of those reusable hose ends....

Thanks Dave,
Yeah, I was very pleased with the results.
The re-usable hose ends are really great.
It's funny how you can't stop thinking about it and then figure it out later...
One thing I want to emphasize is how nice and clean the JIC fittings make it. They all seal 100% with no leaks at all. I used a Teflon sealer paste for the few NPT fitting I had and it was slow drying but sealed 100% too.
Rob-
 
   / New Mods to Loretta's 284 Jinma
  • Thread Starter
#100  
The other mods worked great too.
Loretta had a chance to use her tool box when she wanted to get some low branches off the tree trunks around her garden. She got her hatchet out and cut a few off. She used her loader to move some of the bigger rocks she pooped out and also the grapple to move them. No creaking anymore thanks to the FEL stabilizer connection to the rear end. The tractor was solid and stable thanks to the loaded tires.
She had more traction as well.

I wanted her to test out the bucket reinforcement and the new location of the grapple.
And I was worried the interior support idea might not be enough? But to my delight, the supports worked great. I wanted to see how much easier it was to grapple an object when she drove straight into it and also "clam shell" style. Below are a few photos of her using the grapple. With the grapple located out front more, she could now grab stuff either way with a lot more ease than before. The forward location of the grapple works perfectly with her tooth bar now.


In that second photo above, I was particularly looking for flex in the bucket top lip so I asked her to grab that big stump with one tooth only ... no flex at all!!! then I had her grab it normal with both jaws to see if there was flex that way.
I took a close up trying to show the top of the bucket lip and it is very straight ... as straight as it was when I welded it up. So for those of you who asked about doing the bucket reinforcement from the inside, it does work good.
Rob-


Tractor & Equipment Auctions

RIDE AND DRIVE INFO (A50775)
RIDE AND DRIVE...
1271 (A50490)
1271 (A50490)
2024 AGT INDUSTRIAL QHT-500FL CONCRETE BUGGY (A51243)
2024 AGT...
2005 PETERBILT 357 TRI AXLE DUMP TRUCK (A51222)
2005 PETERBILT 357...
2013 John Deere 160G LC Excavator (RIDE AND DRIVE) (A50774)
2013 John Deere...
2013 BMW X5 xDrive50i AWD SUV (A50324)
2013 BMW X5...
 
Top