Workable Headlights

/ Workable Headlights
  • Thread Starter
#41  
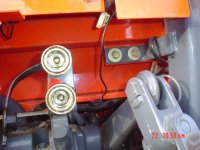
Thanks for clarifying ( and confusing me....ha). That is the pigtail that I thought was for the work light. If you have three lights off of it then that is great news. Also, there appears to be just one bullet connector plugged in. I am assuming your are grounding the lights elsewhere?

Do you know what circuit was used for your round work light?
 
/ Workable Headlights #42  
Thanks for the tips. Very helpful Mousefield.
 
/ Workable Headlights #43  
Here are pics of the adhesive lined shrink terminals I use.

tn3_1134873.jpg
tn3_1134865.jpg
tn3_1134882.jpg


These are from genuinedealz.com/Marine Electrical Supply/. They save time by combining the sealing and shrink wrap in one operation. Seals against corrosion.
 
/ Workable Headlights #44  
I have a 2008 CK35 HST with Woods backhoe. The dealer put on the round work light, the conection is located on the left side as you are looking forward. I have to take the seat off the backhoe to try and take a picture.
The picture does not make it real clear as to were it is. Will try to get a better one tomorrow.
 
/ Workable Headlights
  • Thread Starter
#45  
I have a 2008 CK35 HST with Woods backhoe. The dealer put on the round work light, the conection is located on the left side as you are looking forward.

Had a few minutes and did some exploring this morning. I have a 2006 CK30 and, indeed, did find the second connection that you mention. This wire is more directly under the SMV sign, and comes out of the plastic conduit as two bullet connections (one male and one female). And, as I have mentioned, under and to the right of the SMV sign I have a connection that has a funky attachment to it, that I have not found a mate for. I will probably make it into bullet connections.

My next step will be to play with fuses and determine what fuse controls which of these two connections. Based on all the information, I think I know, but will confirm.
 
/ Workable Headlights
  • Thread Starter
#46  
More Update:

The pigtail under the SMV sign, to the right:
1. off when switch is off
2. on when switch is on
3. off when the customer use fuse is removed

The male/female bullet connection under SMV sign, center:
1. off when switch is off
2. off when just switch is on
3. on when front headlights are on
 
/ Workable Headlights #47  
Very helpful. Thanks.
 
/ Workable Headlights #48  
Saw this post and wanted to ask you about when you drilled through your ROPS...
Could you tell after you drilled it how thick the ROPS wall material is?
I'm thinking about making a ROPS for my 8N, and since this is the type of item that NEEDS to be built right the first time (No second chances here after it gets used once!!), I'd like to know ahead of time how thick of steel is needed to be safe.
Thanks for your help!
 
/ Workable Headlights #49  
More Update:

The pigtail under the SMV sign, to the right:
1. off when switch is off
2. on when switch is on
3. off when the customer use fuse is removed

The male/female bullet connection under SMV sign, center:
1. off when switch is off
2. off when just switch is on
3. on when front headlights are on

Using this info I changed my hookup yesterday. Much better I must say.

- I wired the two lights on the ROPS to the pigtail directly under the SMV sign.

- I added a single spot facing backwards just to the right of the SMV sign and wired it off the pigtail to the right of the SMV sign. I added an on off switch for it too.

- I also used heat shrink fittings, heat shrink tubing over spots where I did not have shrink fittings with dielectric grease in them. I don't have a heat gun yet but that will be easy.

I am very pleased with the results. Thanks all for your tips. NOTE: it was a heck of a lot nicer working yesterday as it was about 30 degrees F versus 4 or 5 the last time I took a crack at this.

Hardacrefarm, I'll measure the ROPS thickness today and post for you. It is not as thick as you may think, maybe 3/8" I'd guess.
 
/ Workable Headlights #50  
If you have a small soldering iron, you can shrink tubing with it. I've done this many many times. Works just as good as a heat gun.
 
/ Workable Headlights #51  
Hardacrefarm, I measured and the ROPS is 1/4" thick tube steel.
 
/ Workable Headlights
  • Thread Starter
#52  
Using this info I changed my hookup yesterday. Much better I must say.

Sounds like you are getting the lights and wiring like you want it. I agree that the forum info has been great, knowing what to look for and where to look.

With the help of two grandsons (5yr and 2yr) I ran my first test connection to two 55watt halogen lights that I have attached to the ROPS with 100lb test magnets from HF and a strip of metal. I will post a picture when I pretty it up a bit. I connected wires from the lights and plugged them into the bullet connectors under the SMV sign and to the left (the ones off the headlight switch). Bright lights and seems to work good, once I got the grandsons untangled from the wire.

I tested them a few times without the tractor running. When I did crank the tractor I could tell that there had been a drain on the battery. Also, if the tractor is running at LOW idle when the lights are turned on, you can tell there is a draw on the power. With more RPMs I could not tell the difference when the lights were turned on. What experience have you had with that?

Also, I have discovered yet some more connections along the wiring tube underneath the SMV sign. Two more bullet connectors (one male, one female) and a small white slide in connector (single wire coming to it I think). I have not tested these yet. These new connections are more center, straight above PTO.
 
/ Workable Headlights #53  
Blew the 7.5 amp headlamp circuit fuse tonight after about 45 minutes. Have to re-look at this.
 
/ Workable Headlights
  • Thread Starter
#54  
Blew the 7.5 amp headlamp circuit fuse tonight after about 45 minutes. Have to re-look at this.

Ouch!! I hope to check out the other bullet connections this weekend. I now have two 55watt lights off the leftmost connections, which come on with the headlight switch. Based on what I know now my plan is:

1. Use the rightmost connection (the one I determined was off the customer use fuse) for the two 55watt forward lights. I will add a separate rocker switch for them. It would seem to me that that separate line could handle these with no problem, and maybe one rear light as well.

2. From the leftmost connection (that is off the headlight switch) I will attach a rear work light

I know, I know.....enough with the light discussion.....get 'em on there and get some work done.
 
/ Workable Headlights #55  
I changed it again. The customer use circuit now runs the two forward facing lamps on the ROPS.
The one under the SMV sign that is to the right now runs the rear facing lamp. both have switches.

Awesome light, convenient, no more fuse issues.
 
/ Workable Headlights #56  
Took a couple more pics of my lights on the 2008 CK35 today. Not sure were you have mounted your switches, I put my chrome plated toggle switches behind the tool box area behind the seat. One is in the middle back of the tool box and the other is to the right of the tool box.
 

Attachments

  • 670DecemberPics 131.jpg
    670DecemberPics 131.jpg
    157.9 KB · Views: 168
  • 670DecemberPics 129.jpg
    670DecemberPics 129.jpg
    152.1 KB · Views: 139
  • 670DecemberPics 136.jpg
    670DecemberPics 136.jpg
    153.8 KB · Views: 179
  • 670DecemberPics 132.jpg
    670DecemberPics 132.jpg
    145.1 KB · Views: 191
/ Workable Headlights #57  
This site seems to only let you post 4 pictures at a time so will post 4 more now.
 

Attachments

  • 670DecemberPics 095.jpg
    670DecemberPics 095.jpg
    145.2 KB · Views: 148
  • 670DecemberPics 138.jpg
    670DecemberPics 138.jpg
    142 KB · Views: 168
  • 670DecemberPics 079.JPE
    670DecemberPics 079.JPE
    14.9 KB · Views: 139
/ Workable Headlights
  • Thread Starter
#58  
I finally got a couple of shots of the lights I installed. For now I only have two lights, which can face either way, and they are on one switch. I used magnets from Harbor Freight to hold a metal strip to which the lights are attached. One shot shows the switch and where I plugged in to the customer use line.
 

Attachments

  • TBN_20100215+002.jpg
    TBN_20100215+002.jpg
    80.9 KB · Views: 174
  • TBN_20100215+003.jpg
    TBN_20100215+003.jpg
    69.3 KB · Views: 168
  • TBN_20100215+004.jpg
    TBN_20100215+004.jpg
    37.5 KB · Views: 169
/ Workable Headlights
  • Thread Starter
#60  
Yes they are small but give out tons of light. I have two more but will wait a bit to install them, to get a better idea of what I need. I believe they are the car drive lights that are normally mounted near bumper.
 

Marketplace Items

Pat's QH and hydraulic top-link.
Pat's QH and...
2012 Peterbilt 386 T/A Day Cab Truck Tractor (A60352)
2012 Peterbilt 386...
2023 TAKEUCHI TL8R2 SKID STEER (A62129)
2023 TAKEUCHI...
HYDRAULIC THUMB FOR MINI EXCAVATOR (A58214)
HYDRAULIC THUMB...
UNKNOWN  500BBL WHEELED FRAC TANK (A58214)
UNKNOWN 500BBL...
New/Unused Quick Attach Bale Spear (A57454)
New/Unused Quick...
 
Top