Here is the 2nd part to my sheet metal post. It was a real pleasure to be painting and installing all of this stuff, rather than cleaning, welding, grinding and bending the necessary parts. Hope you enjoy.

I was finally getting some primer on the sheet metal. I won't show pictures of all the parts being primed, but included this one to show you how nice it was to finally have the part be all the same color. The dash panel had broken in two at that narrow strip that you can see in the lower left hand side. That strip of sheet metal was only about a 1/4" wide. I think the constant flexing at that weak point fatigued and finally broke. I welded another strip the same width on the back side to reinforce it and then welded the holes that had been drilled in the face for the sheet metal screws that attached the plate containing (3) 2" diameter gauges. Then ground the welds down to match the surface of the dash.

Same dash just has a fresh coat of paint and ready to install.

Thought you would enjoy seeing the backside of that same dash with paint and kind of gives a perspective of the spot welded reinforcements on the interior. In the background you can see the finished loader arms with the steering wheel removing puller that I fabricated hanging as a counter balance. It offsets the weight that the steel plates that are welded on the other side of the arms. That steel is the bracket that the leveling cylinder attaches to, which make the arms hang crooked and just makes the job of painting easier if its level.

Most of the dents came out of the hood but a person can only spend so much time on removing dents.

I was pleased with how the fuel tank turned out. I had to straighten out the three attachment metal points on the tank and rethread the nuts and re-do the threaded studs on the bottom of the tank but I think that's normal for a restore.

This one shows the dash and tank now mounted and wiring harness threaded and attached where it's supposed to be. Before I set the gauge cluster, I had to rebuild it. I found it on eBay and it was pretty rough. I disassembled it then carefully cleaned all of the surfaces and made sure all of hands on the gauges inside worked freely then cleaned and polished the glass and sealed it with a new rubber ring gasket that I fabricated out of some glazing bead. I reset the hour meter to 0, then re-assembled everything and it seems to all work now. You'll also notice a new steering wheel, which I didn't tighten the nut on yet until I've started the engine, pumped though power steering fluid and find the power steering motor is not leaking, I didn't wan to fully engage the splines, then have to use my wheel puller and possibly mar the surface of the wheel if I somehow I had a leak and need to pull it back off to fix.

I included this one to show how the wiring harness feeds into the dash area. I still had quite a few wires to hook to their proper places. The Company that I bought this harness from is located in New York and they just did a perfect job with good instruction too! I also installed the newer style diesel shut off handle, it's the red pull handle on the far left, I thought it looked kind of cool.

The reason that I included this picture is it shows the sheet metal lower dash shrouds that I fabricated out of 16 gauge sheet metal. Of course I made a cardboard template then transferred the image to the sheet metal. I added two tabs one on the top and one on the side, then bent the sheet metal on my brake. After punching two holes in each tab lined up behind the holes in the dash; makes for a cleaner looking finish to the dash and I think more protection for the wires. I reversed the template for the other side, then painted and mounted them both with sheet metal screws.

Finally got the hood, tank, and dash mounted. That's a long decal and a guy has to be real careful installing it. I almost had a crash with this one but learned from my mistake and it made it easier doing the other side!

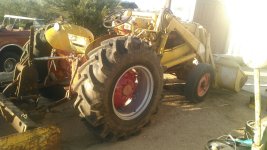
Got the radiator installed and started to line up and fit the hard lines to the hydraulic pump. This was also the point where I was finally installing most of the hard lines and forward wiring harness. If you look in about the center of the picture you can also see the voltage regulator and wires. We're getting closer.

Another perspective that shows most stuff bolted on and decals finished.

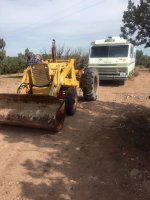
Final shot of the tractor with one of the structural arms on just before I was going to install the loader arms and shaft. The bolts connecting this arm to the front end, axle, and docking bar should not be tightened, because when mounting the other side and loader arms there needs to be some play between all of the parts or you can't push through the 1 1/2" shaft that connects both sides. Once you have all of the holes aligned, the shaft greased, the whole thing goes together pretty well and can now be tightened to specifications. Anyway, I was happy with how the sheet metal turned out!