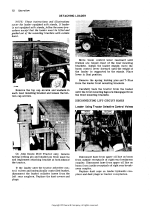
I was able to get the new rod bushings pressed in and reamed out properly. I was then able to assemble the pistons to the rods that had new bearings and bushings installed.
With the liners already in place, I cleaned the crank and sump pump screen as well as the oil pan and block mating surface.
With the help of a friend, we went about installing the pistons into each liner. As ovrszd mentioned I purchased a 3-5" piston ring compressor from my Napa and followed the youtube video I posted above.
After making a mistake, and after all three pistons were installed, connected to the crank and properly torqued, we had to take them back out because we placed the piston ring openings/gaps 180 degrees opposite of one another but directly over the wrist pin opening!!!
I read and reread about how this is a no no. So we had to go about correcting that.
After getting the pistons reinstalled, rod cap bolts torqued (45 ft lbs), we then cleaned the deck and head again, and again, before we placed the HG.
I read and reread about this subject as well. The manual states you should place a thin film of permatex #3 on the gasket before placement. I read and reread that with clean surfaces, you shouldn't place/have to place anything on a HG. I didn't use anything for the install???? :confused3:
We went about installing all the head bolts into the block, in the exact same holes they came out of. We then torqued (110 ft lbs) them down per the manual's specific order and to the correct torque spec.
So now we went about getting the rocker arm (30 ft lbs), push rods installed. We then found out (read in the manual) about the flywheel timing hole, and going about setting the proper valve clearance tolerance. We were able to ensure each intake and exhaust valve was set properly with feeler gauges. It took us awhile to figure out what the manual was stating, just because we don't know what the **** we are doing. :thumbsup:
Then we placed the new injectors into the head, cleaned the rocker arm cover and head mating surfaces for the new gasket, and started to go about re-connected the water pump, fuel lines, alternator, drive belt, radiator, intake and exhaust plumbing, etc. While using new gaskets for items that needed them while going about the re-installing process. I flushed the radiator for good measure and blew it out through the fins with some compressed air as well.
Finally, we have it all set up, refilling the coolant, removed the oil filter and put on a new one, and ready to fill the motor with oil......and my friend says " Hey, per the pistons supplier's engine break in procedures, you need to use specific break in engine oil".
:shocked:
After some research, we were able to find that Napa in Sumner carried 1qt containers of this proper break in oil. If someone tries to sell you a break in additive for regular engine oil I have been convinced you shouldn't.
We get back to the barn and fill the old girl up.
We then had a **** of a time bleeding the tractor, but was able to use the manual and get it done. We bled at the injectors and at the fuel bowl/primer lever thingy. What a good idea JD, just shoot diesel everywhere from pumping that little primer lever!!!!
During the rebuild process I also changed out the water temp gauge and fuel gauge. I must have crossed the wires or not installed them correctly, because during the initial start up my engine wiring harness/loom started to smoke!!! I disconnected the fuel and water temp gauge's electrical connections to the harness and the smoking stopped. So I will need to cut back the tape and see how far the damage made its way into the wiring loom. Fix it, then reinstall gauges CORRECTLY!!!
The only other problem is that two of my new injectors are leaking. They leak/seep where the injector goes into the head. The new injectors came with new little rubber washers that are supposed to seal to the block? The retaining bolts that go into the block are tight. Any ideas? I was thinking of tapping on the plates that hold the injectors in the head to see if I can get them to "seat" farther down?
And here are some videos and pictures of the rebuild, and some other projects (french drain fix, down spout hard pipe project, retaining wall upgrade) I have been working on/completed since I started this rebuild months ago. And Marcus!!!!
IMG_122 on Vimeo
IMG_126 on Vimeo
IMG_127 on Vimeo
IMG_128 on Vimeo

IMG_94 on Vimeo
https://vimeo.com/211379931/5bbfbfc555


With the liners already in place, I cleaned the crank and sump pump screen as well as the oil pan and block mating surface.
With the help of a friend, we went about installing the pistons into each liner. As ovrszd mentioned I purchased a 3-5" piston ring compressor from my Napa and followed the youtube video I posted above.
After making a mistake, and after all three pistons were installed, connected to the crank and properly torqued, we had to take them back out because we placed the piston ring openings/gaps 180 degrees opposite of one another but directly over the wrist pin opening!!!
I read and reread about how this is a no no. So we had to go about correcting that.
After getting the pistons reinstalled, rod cap bolts torqued (45 ft lbs), we then cleaned the deck and head again, and again, before we placed the HG.
I read and reread about this subject as well. The manual states you should place a thin film of permatex #3 on the gasket before placement. I read and reread that with clean surfaces, you shouldn't place/have to place anything on a HG. I didn't use anything for the install???? :confused3:
We went about installing all the head bolts into the block, in the exact same holes they came out of. We then torqued (110 ft lbs) them down per the manual's specific order and to the correct torque spec.
So now we went about getting the rocker arm (30 ft lbs), push rods installed. We then found out (read in the manual) about the flywheel timing hole, and going about setting the proper valve clearance tolerance. We were able to ensure each intake and exhaust valve was set properly with feeler gauges. It took us awhile to figure out what the manual was stating, just because we don't know what the **** we are doing. :thumbsup:
Then we placed the new injectors into the head, cleaned the rocker arm cover and head mating surfaces for the new gasket, and started to go about re-connected the water pump, fuel lines, alternator, drive belt, radiator, intake and exhaust plumbing, etc. While using new gaskets for items that needed them while going about the re-installing process. I flushed the radiator for good measure and blew it out through the fins with some compressed air as well.
Finally, we have it all set up, refilling the coolant, removed the oil filter and put on a new one, and ready to fill the motor with oil......and my friend says " Hey, per the pistons supplier's engine break in procedures, you need to use specific break in engine oil".
:shocked:
After some research, we were able to find that Napa in Sumner carried 1qt containers of this proper break in oil. If someone tries to sell you a break in additive for regular engine oil I have been convinced you shouldn't.
We get back to the barn and fill the old girl up.
We then had a **** of a time bleeding the tractor, but was able to use the manual and get it done. We bled at the injectors and at the fuel bowl/primer lever thingy. What a good idea JD, just shoot diesel everywhere from pumping that little primer lever!!!!
During the rebuild process I also changed out the water temp gauge and fuel gauge. I must have crossed the wires or not installed them correctly, because during the initial start up my engine wiring harness/loom started to smoke!!! I disconnected the fuel and water temp gauge's electrical connections to the harness and the smoking stopped. So I will need to cut back the tape and see how far the damage made its way into the wiring loom. Fix it, then reinstall gauges CORRECTLY!!!
The only other problem is that two of my new injectors are leaking. They leak/seep where the injector goes into the head. The new injectors came with new little rubber washers that are supposed to seal to the block? The retaining bolts that go into the block are tight. Any ideas? I was thinking of tapping on the plates that hold the injectors in the head to see if I can get them to "seat" farther down?
And here are some videos and pictures of the rebuild, and some other projects (french drain fix, down spout hard pipe project, retaining wall upgrade) I have been working on/completed since I started this rebuild months ago. And Marcus!!!!
IMG_122 on Vimeo
IMG_126 on Vimeo
IMG_127 on Vimeo
IMG_128 on Vimeo

IMG_94 on Vimeo
https://vimeo.com/211379931/5bbfbfc555


Last edited:

