International 444, 1968. Progress Thread, Getting Going

   / International 444, 1968. Progress Thread, Getting Going #151  
***What have you found to be the most useful? What really comes in handy that you use once in a while but are really glad you have it?***

Got carried away above and forgot this. Gosh there are so many, but all in all I'd have to say the air die grinder. That and the 2" Roloc head and medium gasket removal discs. It sure makes cleaning up mating surfaces a lot faster. I got mine at HF probably 40 years ago, back then they were made in Japan. It was a little more than the others they had but used less air which was great using it with the small compressor I had at that time.

I still buy new specialty tools like seal inverting tool set for rebuilding hyd. cylinders, sets of torx screwdriver for working on small carbs. Crow foot/flare nut sockets to get in tight places, and the list goes on, I don't know that you can have everything. I bought some filing cabinets to keep specialty tools in and other items. Many come from Amazon, they're only used occasionally, not like I'm making a living with them, although I do have a few Snap-on tools like a torque wrench etc. I've come to the point in my life where now my motto is, "It's gonna' look good on the sale bill someday." I pity the poor souls that will have to set it up, but it's going to be a dandy..!!
 
   / International 444, 1968. Progress Thread, Getting Going
  • Thread Starter
#152  
We go to the flea market place near Hocking Hills off rt 33 every once in a while. There are a couple of the store vendors (you rent space in there to show items then they take a percentage) that sell tools. Ill have to look in to some things there next time we go. Though, I need the hammers sooner than that.
 
   / International 444, 1968. Progress Thread, Getting Going #153  
In the early 70's there was a place on the SE side of Columbus called Corvairs. They bought merchandise from store closures and other items. You bought tools there by the pound. IIRC like $1.49 a lb. A good place to pick up a second set of tools, seems you always needed a second wrench the same size removing bolts with nuts on the other end.

You never knew what you'd find there, even vehicles. Pulled in one Sat, morning in the early 80's and there was like 25 DeLorean cars setting there, brand splinter new after they went bankrupt. Seems they had a price tag of around $6K, half what they were selling for when in business but that'd be like $100K now. Saw a fleet of new mail Jeeps w/right hand drive. Some painted USPS colors, some not.

You can check the story by using Google and the guy's name was Sol Shenk.
 
   / International 444, 1968. Progress Thread, Getting Going
  • Thread Starter
#154  
For the top of the transmission case the FELPRO KARROPAK material would work fine, being nothing there is pressurized. Thickness would be determined by the thickness of the original gasket they make it in several thicknesses.
It looks like the housing gaskets are .012-.014". It appears Karropak comes in a .015"/1/64" thickness so that looks to be close enough.

I found an 18"x30ft roll on Ebay for $35 and free shipping. Id say that is a good deal - stock for other projects too.
 
   / International 444, 1968. Progress Thread, Getting Going #155  
Sounds like you're off to a good start. Now to find a steam iron to flatten it out. You may even already have one that's not used around the house anymore. Give the material a good spritz of water and just iron the "roll" out of it. It may take 2-3 times as big as that piece will be but flattens it out nicely. I use a piece of scrap plywood and sawhorses as an ironing board.

If you don't have one, they're fairly cheap for $10 or so at Wally-World. Secondhand stores even less.

That big of a piece should literally last you for years. Just store it in the dry, I don't know that it goes bad. Here, for cheap storage, I've been buying 4 drawer filing cabinets from Habitat for Humanity which are probably 30 years old back when they were made pretty heavy. I'm assuming these came out of offices. Cheap storage cabinets for $20 ea. Great for storing specialty tools, filters, etc. and best of all mouse proof. Just some food for thought.
 
   / International 444, 1968. Progress Thread, Getting Going
  • Thread Starter
#156  
Well the gasket making process took a bit to figure out. We started on the larger rear end housing and had to re-do it. The ring gear sticking up screwed up the stretching over of the gasket material. We tried to walk it around and fold the gasket material back over the ring gear once we got the inside cut a bit. Somehow we still ended up with about 1/2" extra on the other side that wouldn't sit right.

We re-made the gasket a 2nd time with a slice in the middle to let the ring gear through. That way we could lay the exterior flat on the housing from the start.

Before I get to any of the pictures - we're at a pretty big stuck point. I can't get the shifter forks lined up with the slider gears. I had the transmission housing sealed thinking I was OK, but I got the trans in 4th gear and it would not shift back in to neutral. The shifter went, but it was still locked in gear. My assumption is the fork missed the slot for the slider gear and was able to engage it, but not disengage it.

After fighting with the forks and slider gears I did get a tape measure out to try to line up the forks and sliders starting from the 1st set closest to the engine - the range gears. Somehow I'm still screwing things up.

Does anyone have any words of wisdom?

My main conundrum with this one is I don't have all the time in the world to keep "test fitting" once I get the gasket sealant on. It does dry - which is where I am now. I had to tear it apart and have to start over with the scraping and surface prep.

My goal is to get things to line up so the cover and forks go right in to place routinely to build confidence before I coat the gasket sealant. This is one major step that has to be done right now otherwise I'll loose a couple months of work finding out after everything is buttoned up that it isn't "right".
 
   / International 444, 1968. Progress Thread, Getting Going
  • Thread Starter
#157  
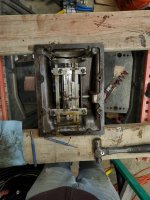
Here are some pictures of what we did do so far.

This is a contrast between the non-prepped transmission housing and the prepped rear end housing. I used a polycarbonate disk from Harbor Freight. I've used these disks for surface prep prior to painting before and have had good results. It appears to have worked here, also.

I used emery cloth around the pins and other places where I couldn't get the grinder/disk.
20250315_195218.jpg


This is the start of the rear end housing gasket. This is the 2nd round. The 1st round did not have the slice in it for the ring gear. I used the center cut out of that 1st attempt as the material for the transmission housing.

20250316_162544.jpg


20250316_165059.jpg


20250316_165951.jpg


This is the transmission housing end of things.

As mentioned in the previous post, I am having trouble with getting the forks lined up. This gasket needs to be re-made and the surfaces prepped again at this point. But the pictures do a good job describing the process.

20250316_171747.jpg


20250316_173632.jpg


20250316_181218.jpg


20250316_181405.jpg


This is the gasket sealant I am using. Hopefully it does the job and lasts.

20250316_213803.jpg
 
   / International 444, 1968. Progress Thread, Getting Going #158  
Your gaskets look great..!! I use several different Permatex brush on sealers, I've had good luck with taking parts back apart if needed without harming the gasket if I'm careful.

If it were me, I'd probably do a dry assembly first before putting the sealer and gasket on and make sure the shifters do what they are supposed to do. With the main transmission shifter and range selector in neutral, you could crib the gear shift mechanism up on 2 X 2 wood blocks. Might give you enough room to look through from the side with a good bright light and get the gears aligned to match the forks with a long screwdriver or something similar.

Most I've dealt with the top has to drop straight down. Having a helper makes it a lot easier to pull the cribbing then drop it down. I'd put the 4 end bolts in and snug with a wrench just beyond finger tight to make sure the shifter mechanism doesn't move, then see if everything shifts as it should. If it does, pull it off, prep the surfaces and go through the process again.

If memory serves me correctly seems I remember you having the shift assembly apart. Just be sure the shift rails, forks and detents are in the correct positions. Looking at the first picture, although it appears to be in first or third gear's the shifting forks side by side sort of throws me, but could be the way it is. Just so happened to do a Google image search and found a shift tower for a 444 on ebay. Even through it appears to be in neutral, the forks are staggered. Just doesn't seem possible for them to end up, side by side like it appears yours is. Maybe it's just the angle of the picture.

1742217471043.png
 
   / International 444, 1968. Progress Thread, Getting Going
  • Thread Starter
#159  
Your gaskets look great..!! I use several different Permatex brush on sealers, I've had good luck with taking parts back apart if needed without harming the gasket if I'm careful.
Thanks - and not the complement on the work, rather for the new skill. That is a big part of working on my own stuff for me - learning and growing. I've never made gaskets like this before and for all the projects I've done over the years - and will continue to do - it has already been a worthy skill to have picked up along the way here. So thank you!
If it were me, I'd probably do a dry assembly first before putting the sealer and gasket on and make sure the shifters do what they are supposed to do. With the main transmission shifter and range selector in neutral, you could crib the gear shift mechanism up on 2 X 2 wood blocks. Might give you enough room to look through from the side with a good bright light and get the gears aligned to match the forks with a long screwdriver or something similar.
I agree on the dry fit. The cribbing idea sounds like a great idea. I will have to give that a shot. I have a few options for things to use to knock the gears around if I have a decent gap in the housings to get through.

I was just trying to hold the gear shifter and drop the assembly as straight down as I could by hand. For as heavy as it is, that isn't an easy task (my back really hurts from all that yesterday). The cribbing idea will make that a lot easier for positioning. I'm thinking rigging a hoist to help support the weight also.
Most I've dealt with the top has to drop straight down. Having a helper makes it a lot easier to pull the cribbing then drop it down. I'd put the 4 end bolts in and snug with a wrench just beyond finger tight to make sure the shifter mechanism doesn't move, then see if everything shifts as it should. If it does, pull it off, prep the surfaces and go through the process again.

If memory serves me correctly seems I remember you having the shift assembly apart. Just be sure the shift rails, forks and detents are in the correct positions. Looking at the first picture, although it appears to be in first or third gear's the shifting forks side by side sort of throws me, but could be the way it is.
I did have the whole shifter apart - I had to in order to get it cleaned (what was the shift problem originally - gunked up and rusted). I did take care to assemble it the way I took it apart, after cleaning of course.
 
   / International 444, 1968. Progress Thread, Getting Going #160  
Working on equipment by yourself can be a challenge at times. Figuring on how to get it done by yourself can be quite rewarding. An engine hoist can be a great helper at times. I bought one 40-some years ago after saving up for a while to by one. Worth every penny and still use it occasionally. Then making lift tabs from odds & ends scrap steel to go along with it. That comes with time over the years.
 

Tractor & Equipment Auctions

Utility Trailer (A45336)
Utility Trailer...
2015 Ford F-550 4x4 Forestry Bucket Truck (A44571)
2015 Ford F-550...
Year: 2021 Make: Ford Model: F-150 Vehicle Type: Pickup Truck Mileage: 37,337 Plate: Body Type: 4 (A44572)
Year: 2021 Make...
Zero Turn Mower (A44572)
Zero Turn Mower...
2018 JLG 8042 8,000lb 4x4 Rough Terrain Telehandler (A44571)
2018 JLG 8042...
2016 Ford Escape S SUV (A44572)
2016 Ford Escape S...
 
Top