dcyrilc
Super Member
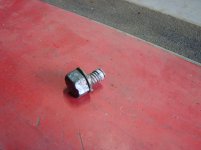
Glenn I may be getting ahead of myself here because I haven't seen the photo's but I thought I would post this so that everyone could see it. This is a extractor set made by Mac tools. It's a set I have had for some time now but it's an exceptional tool to own especially if you need to get broken bolts out. Each size has the drill size marked on it so there's no guess work. It's got me out of some bad situations at times.
Nice set. I hope you never have to use that largest extractor.:laughing:
")
![Tractor and baler[640x480].JPG](/forums/data/attachments/157/157684-70edf292201429fef924251db591b3ab.jpg)
![Baler [640x480].JPG](/forums/data/attachments/157/157686-784506891fc0bba191aff324decb31a5.jpg)
![Knotter [640x480].JPG](/forums/data/attachments/157/157692-7c20fbe2392a8ef852ff774c79d16017.jpg)
![loader[640x480].JPG](/forums/data/attachments/157/157699-0bafa7b3a3c65ab09242c95a55d74d4f.jpg)
![P8110037 the problem[640x480].JPG](/forums/data/attachments/157/157702-347a7028e062fed248616a7f016ae43a.jpg)
![half inch plates [640x480].JPG](/forums/data/attachments/157/157705-348fa67e3b6ad4a5def4c0d7027995f4.jpg)
![broken bolt[640x480].JPG](/forums/data/attachments/157/157711-b04747af03ccf8bc600e5da8a3911583.jpg)
![Engine block mount[640x480].JPG](/forums/data/attachments/157/157717-0f401b1474c12f5dde18141b3bf620cd.jpg)
![Easy out set[640x480].JPG](/forums/data/attachments/157/157725-8b9e6c28e2a53361ea93021fc7005d27.jpg)