You are using an out of date browser. It may not display this or other websites correctly.
You should upgrade or use an alternative browser.
You should upgrade or use an alternative browser.
Outdoor Kitchen
- Thread starter buggyman1
- Start date
- Views: 49591
More options
Who Replied?
/ Outdoor Kitchen
#81

polo1665
Super Star Member
Coming right along Buggyman! Did you buy the angle grinder polishing set up for your counter tops? I had thought about doing concrete, but I'm not sure now. We saw granite for $39/sqft installed and may go that way. Looks good so far, thanks for the update.
Mark
Mark
OP
buggyman1
Platinum Member
Coming right along Buggyman! Did you buy the angle grinder polishing set up for your counter tops? I had thought about doing concrete, but I'm not sure now. We saw granite for $39/sqft installed and may go that way. Looks good so far, thanks for the update.
Mark
I'm using my random orbit sander with the diamond pads and water.
OP
buggyman1
Platinum Member
One more question: What kind of grill did you get? Looks pretty nice, but you may want to consider using metal framing around it. Just a suggestion, they get pretty hot.
The grill came from lowes, not sure of the brand. I couldn't justify paying 3 or 4 grand for the grill.
SPIKER
Elite Member
looks pretty darn good. have to let us all know how much work the concrete counter tops take for final sanding & sealing... I am thinking of going the same way my lowes and Menards carry the quickcrete counter top stuff. wasnt sure best way to try and get mine up stairs though... thinking have to pour them almost in-place or at least pour them in the 2nd floor room then flip em over like yours are. would be nearly impossible to move them up the stairs and probably just as much as flipping them over without pouring them in-place.
How would that work??? have to finish trowel the top surface to smooth then sand to finish? never done it myself but the build of this place has been a full series of never done it before ...
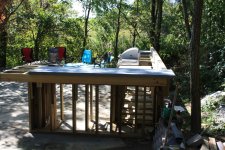
got my floor finished
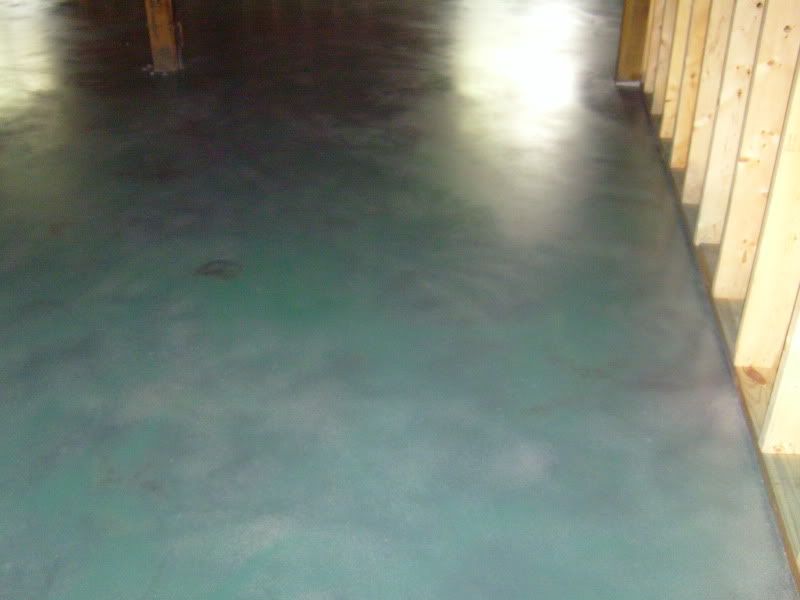
little too wet here in ohio to get much done floor waited 40 days to stain then over 2 weeks after staining to seal and still floor has some blushing in the sealer and some spots that didnt stain well or stick well due to moisture I think..
mark
How would that work??? have to finish trowel the top surface to smooth then sand to finish? never done it myself but the build of this place has been a full series of never done it before ...
got my floor finished
little too wet here in ohio to get much done floor waited 40 days to stain then over 2 weeks after staining to seal and still floor has some blushing in the sealer and some spots that didnt stain well or stick well due to moisture I think..
mark
OP
buggyman1
Platinum Member
looks pretty darn good. have to let us all know how much work the concrete counter tops take for final sanding & sealing... I am thinking of going the same way my lowes and Menards carry the quickcrete counter top stuff. wasnt sure best way to try and get mine up stairs though... thinking have to pour them almost in-place or at least pour them in the 2nd floor room then flip em over like yours are. would be nearly impossible to move them up the stairs and probably just as much as flipping them over without pouring them in-place.
How would that work??? have to finish trowel the top surface to smooth then sand to finish? never done it myself but the build of this place has been a full series of never done it before ...
got my floor finished
little too wet here in ohio to get much done floor waited 40 days to stain then over 2 weeks after staining to seal and still floor has some blushing in the sealer and some spots that didnt stain well or stick well due to moisture I think..
mark
It is a messy process, it could be done indoors but you would have to cover everything. I used liquid color and mixed it in when mixing the concrete, just pour it in the water. Sanding is also messy as you have to use water, and sanding the slurry will be worse. I don't think pouring in place you could get it as smooth as using the upside down method, it really comes out almost perfect.
OP
buggyman1
Platinum Member
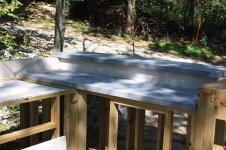
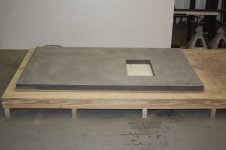
To give everyone an idea of how heavy they are: The lower one in the picture measures 861/2" x 26" x 2" We used 5, 80lb bags of concrete, a gallon and 1/2 of water per bag, plus the rebar. Not sure what happens to the water in the chemical process as far as weight goes. I'm guessing it weighs around 425lbs at least.
Attachments
ustmd
Platinum Member
Buggyman1,
Those look great.
Now I may have to buy that mixer:laughing:
Those look great.
Now I may have to buy that mixer:laughing:
OP
buggyman1
Platinum Member
Buggyman1,
Those look great.
Now I may have to buy that mixer:laughing:
Thanks...I wouldn't have even attemped it without the mixer.
SPIKER
Elite Member
buggy, I forgot to ask did you use any of the glass agent/polished broken bits/materials in the mix or in the pour? Saw some small tables done this way like a mosaic type thing but was set on the mold first then the crete poured over it. I dont think it was mixed in and then poured as that would bury much of it. only saw the end result not the process...
mark
mark
OP
buggyman1
Platinum Member
buggy, I forgot to ask did you use any of the glass agent/polished broken bits/materials in the mix or in the pour? Saw some small tables done this way like a mosaic type thing but was set on the mold first then the crete poured over it. I dont think it was mixed in and then poured as that would bury much of it. only saw the end result not the process...
mark
LOL, yes i tried it with coins on the end counter (the one with the small cut-out for a small sink). I used quarters, dimes, nickels, and pennys. I used spray adhesive to stick it to the form. It stuck good, they are there, the funny part is (God as my witness) i did not know that pennys were not all copper (lol) i sanded the copper right off them, they look more like dimes. I wouldn't recommend using coins, it also grinds down the other coins somewhat.
OP
buggyman1
Platinum Member
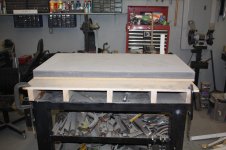
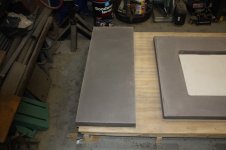
Out of the molds: I think they turned out pretty good, i wish i'd put a thicker bead of caulk around the edges, and finished the bottoms better (forgot about the overhangs), and i still haven't seen the tops yet (they may be totaly screwed-up) , overall i'm happy how they look so far. I filed down the edges on the bottoms with just a hand file to keep them from chipping out. Be careful with this, it's a knuckle getter.
Attachments
OP
buggyman1
Platinum Member
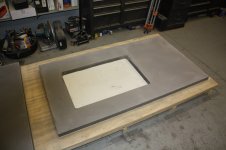
The more you vibrate the better when pouring. These have a lot less pin-holes than the first ones. I even vibrated the sides of the molds this time, and i think it helped a lot. Now comes the fun part...putting them in place.
firefighter9208
Platinum Member
A couple more pics.
Is this the backside (unseen) or the topside??? How will you fill in the pin holes and them match???
I would like to do these for inside the house if they work our for you.
Chris
OP
buggyman1
Platinum Member
Is this the backside (unseen) or the topside??? How will you fill in the pin holes and them match???
I would like to do these for inside the house if they work our for you.
Chris
Yes, you're looking at the bottoms. The top side's are facing down against the melamine, they come out perfectly flat. When you flip them over you have almost a perfect top (and sides). I'm going to mix-up a slurry to fill the pin-holes (i'm using the quikrete mix and color, and just pouring it through a screen). Kinda do it like drywall, or wood putty and screed it off with a wide puddy knife, filling the holes, let dry, and then start with 400 grit, sand, and work your way up (im sanding to 1500 grit). You may have to do this a couple of times to get a good finish.