Arc weld
Veteran Member
Structural codes, ASME codes, AWS codes, Military codes, etc., etc. Nobody would ever live long enough to go through all of them.


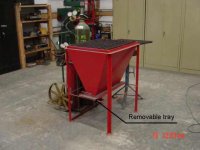
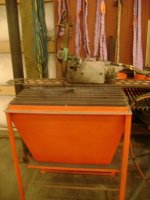
Or build a hopper and removable tray like I did for my burning table.

You might consider building a water box to go under the cutting table. It will help keep slag and hot sparks from flying around when using the plasma.
Or build a hopper and removable tray like I did for my burning table.
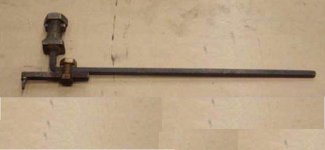
While your building, build one of these to burn circles with. Get a wheel off a truck or car, so you have bearings for the table to rotate smoothly. You'd be surprised how nice of circle you can burn with this.
While your building, build one of these to burn circles with. Get a wheel off a truck or car, so you have bearings for the table to rotate smoothly. You'd be surprised how nice of circle you can burn with this.
Tomorrow.It sounds like you been at it for more than two whole weeks.
The bottom key stock it tapped. I think I used something like a 10 x 24 cap screw cut the head off and ground a point on it. Find the height you like, use the jam nut to lock the 10 x 24 cap screw so it won't move on you.how do you keep the tip at the proper height from the material?
The bottom key stock it tapped. I think I used something like a 10 x 24 cap screw cut the head off and ground a point on it. Find the height you like, use the jam nut to lock the 10 x 24 cap screw so it won't move on you.